Jobcard (Only) - Digital Workflow
Complete Jobcard in Evolv WMS - Digital
1. Click on Dashboard

2. Click on Open new Jobcard

3. Click on Scan License Disc
This option allows you to scan a vehicle’s license disc, automatically retrieving details such as the VIN, engine number, license plate, and colour. This feature helps ensure accuracy by reducing the likelihood of manual entry errors.

4. View the vehicle details

5. Click on add Customer

6. Click on Manual Capture
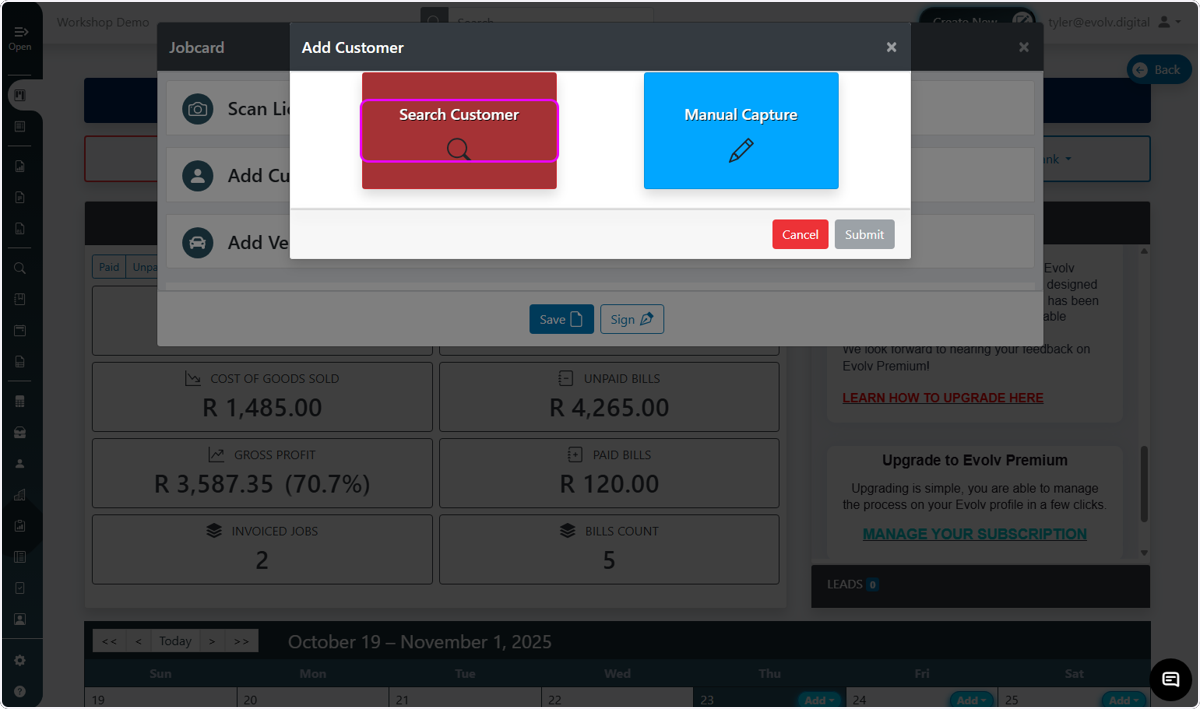
You will then see two options: Search Customer and Manual Capture. Since we’re creating a job card for a new customer, select Manual Capture. For existing customer use Search Customer

7. Populate the customer details followed by clicking Submit

8. Select "Add Vehicle"

9. Populate the details
Select the vehicle by choosing its brand, year, range, and model. The Manual Capture option is available for vehicles that aren’t listed in the selection database.

10. View the Vehicle details and Submit
After selecting your vehicle, fill in the vehicle details, VIN, Engine number, License Plate and Colour. Please note that if you used the "Scan License Disc" then these details would be filled in by the system when you get to this page.
Once done, click on Submit

11. Click on add Mechanic
You will then see a list of your saved mechanics to choose from. You will need to have your mechanics saved in the mechanics tab first.

12. Select the Mechanic followed by submit

13. Add any Notes
The note section is where you can record the customer complaints, essentially the issues the customer wants to be attended on the vehicle.

14. Click on "Add Service Categorys"
The "Add Service Categories" option is meant to be used when there is a known repair to be performed on the car, for example, if the vehicle needs a minor service.

15. Add your service categorys

16. Select Add to job card

17. Click on Save

18. Click on Add checklist

19. Select the Checklists needed

20. Click on Save

21. Click on Print

22. Select the desired pages followed by "Print"

23. View the Documents printed

24. Click on Sign

25. Populate the Check in sheet

26. Click on image

27. Mark the dents and scratches

28. Select Photos and upload any photos

29. Click on Submit

30. Click on Customer Signature

31. Agree to the terms and conditions

32. Sign and Submit

33. Click on Submit

34. Click on Open new Jobcard
When creating a Jobcard for an existing customer, the process may differ slightly, as the customer — and likely their vehicle details — are already stored in the system.

35. Click on Add Customer

36. Click on Search customer
37. Search and select a customer
You can search by First name, Last name, Phone number or Email address.

38. Click on Select Vehicle

39. Select a vehicle
You can choose from the list of vehicles already saved or you could add a new vehicle using the green "Add Vehicle" button.

40. Click on Submit

41. The steps from this point, are exactly the same as when you are creating a Jobcard from a new customer.
Related Articles
Jobcard-to-Completion Workflow
Jobcard-to-Completion Workflow Creation Date: Oct 24, 2025 Created By: Aidan Quin View most recent version 1. Open an Existing Jobcard 2. Click on Create Followed by Quote 3. Click on Create new customer For new customers, capture the details here, ...Quote to Completion Workflow
Quote-to-Completion Workflow Creation Date: Oct 27, 2025 Created By: Aidan Quin View most recent version 1. Click on "Create New" followed by "Create Quote" 2. For Existing Customers search them 3. For New customers click "Create New Customer" 4. ...Quote, CRM and Payment Workflow
Quote, CRM Payment Management Workflow Creation Date: Oct 27, 2025 Created By: Aidan Quin View most recent version 1. Click on the vehicle 2. Click on Print Actions 3. Print Actions You can print your Quote ,Job card, check-in sheet, terms and ...Job Card (Only) - Printed Workflow
Complete Job Card in Evolv WMS – Printed Creation Date: Oct 23, 2025 Created By: Aidan Quin View most recent version 1. Click on Open new Jobcard 2. Click on Add customer 3. Click on Manual Capture As the Jobcard is being created for a new customer. ...Digital Supplier Request For Quote (RFQ)
Digital Supplier Request For Quote (RFQ) Send, receive, and update supplier quotes via WhatsApp, email, or link — all without the back-and-forth. With Digital Supplier RFQ, requesting prices from suppliers is quick and hassle-free. Send a purchase ...